Aerotech Peacemaker kit review.
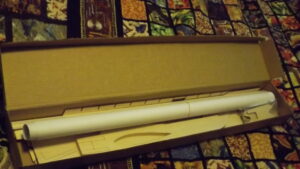
Unlike the majority of laser cut ‘short’ kits, Aerotech kits come with all the strip & block wood along with the laser cut balsa and ply parts and the plan. You don’t have to scrabble around finding stock wood to fit the the laser cut parts, it is done for you at the factory and provided in the kit. I for one appreciated this touch after having given up on laser cut kits for the very reason there was never strip wood. The kits have no hardware provided, but the majority of builders have their own which we prefer to use. I found the provision of the plan a neat touch as it is a 200km round trip for me to have one printed off.
This is review of a pre-production version of the kit produced by Bill East of Aerotech Kits. The presentation, wood selection and precision in this kit are second to none.


The Peacemaker has an ‘egg box’ wing construction.

The spar is two part joined with a splice in the outboard panel. Steel rule taped in place to keep it straight as glue dries.

The wing fits together accurately.

This is the alignment of the rib trailing edges in dry assembly prior to wicking in the superglue. Nice.

One of the leading edge strips needs to be trimmed at an angle (30deg) so the other laps over it to form the joint. Marked out here ready to trim.

I set up the band saw table and guide to strip it down. Here a sample piece is being cut to check the settings are right. I cut slightly oversize and did quick sand to adjust the final size and angle.

All this sounds a bit tricky but in practice it works out easily and the resulting fit is good.


LE glued up and pinned. I use Titebond aliphatic glue as it dries reasonably quickly and allows time for alignment.

The plan shows 1.5mm tips. I made mine 3mm and the kit is now supplied with 3mm tips. The wingtip riblets were a little undersize, but Bill has fixed this in the kit you will get. I used an undersize riblet at the spar to get the wingtip square before adding the remaining riblets.


Bit of a sand with the T bar to get everything flush. Masking tape stops me sanding away the ribs.

A nut soldered to the bellcrank works as a bearing when screwed onto the bolt, which is epoxied to the plate.

I like to paint bellcranks – because I can. Bike spokes make the push rods and heavyweight laystrait is soldered on for leadouts

Bit hard to see but exit hole for the pushrod is reinforced with crossgrain 1.5mm scrap to stop centre sheeting cracking.

Bill cuts the fuselage on a scroll saw to ensure the edge is at right angles. He explained to me that, due to the nature of the of the beam, the laser cuts an angled kerf. This is ok on thinner woods, but the angle is evident on thicker sections such as the 1/2″ fuse. Engine spacing and bearers are marked but you cut them out so they can be adjusted to suit your engine.

OK, now the bearers are epoxied in. Extra holes are for hard points to screw the tank too.

Checking tank fit. Uniflow tanks are made to same screw pattern to allow tank interchanging.

Fitting up the donk. This is a 1963 Taipan 2.5 which I have had from new and survived my aeromodelling antics as a teenager.


I used 3mm birch ply doublers rather than 1.5mm shown on the plan to improve rigidity. I believe the production run kits also have 3mm ply facings.

I added a balsa cheek, which is not in the kit, just because I like them. Bent the nose leg from 5/32 wire (bit thicker than the plan) and let the top end into the bearer.

‘mmmm … That looks OK so far. I added some triangle stock in the engine bay. I like to get the front end on profile models rigid so vibration is minimised meaning better fuel feed and engine runs.

I finished all the balsa parts ready for assembly with a couple of coats of dope followed by lightweight silk span doped on. Then two coats of sanding sealer and two of dope. The sanding sealer is equal parts of dope, thinner and talcum powder. Smells great when you sand it.

The peacemaker has these huge fixed flaps. They need to be at zero incidence and exactly in line with each other to get an accurate flier. I marked centreline on the fuse sides and drilled through with the drill press to get the alignment correct. Bill cuts the flaps so the grain runs along the TE of the flaps to prevent warping once they are fitted.

Wing fit to fuse. Few gaps here, but that’s expected.

So they get filled with slivers of balsa where needed. Then epoxy and micro-balloons using the special stick.


I covered the wings in BEM silk. What is this? BEM silk is not silk at all, it is a dress lining fabric. The stuff I have is 2 oz/sqyd. It can be applied wet and doped on. It can also be convinced to go around compound curves such as wingtips. As you can see I did each wing panel in one piece. The other thing is that dope fills the weave easily and does not run through causing ugly runs you can’t get rid of.

Yeah – Nice

Did traditional cloth tape hinges. I like them. I also like to add a 1/32″ ply reinforcing top and bottom for the control horn.

Ready for paint. Now that could take a little while as I have to wait for appropriate weather to do the spraying as I don’t have a spray booth. Also I have to do battle with the masking tape and will the paint bleed under it – gotta psych myself up for it.
you will need to check back once I have done it – Andy