Resetting a Cox Piston Ball & Socket Joint
We all know that Cox .010 .020 .049/.051 & .09 engines have a ball and socket joint in place of the traditional gudgeon pin set up in all our other engines. We also are aware that his ball and socket is supposed to be reset occasionally especially as the engine is being run in.
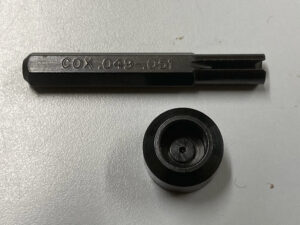
Some of us have the special Cox tools to make this adjustment. Some of us either don’t have this tool, or don’t bother to use it.
The following photo shows what happens eventually if you don’t reset the ball joint tolerance. Notice the tit in the centre of the piston in this photo. This is the result of the ball on the end of the con rod coming up through the piston crown. This engine was run hard on crank case pressure for many flights without resetting the tolerance. This resulted in the ball and socket tolerance becoming excessively loose allowing the ball to hammer up through the piston from the underside. There is actually a pinhole in the top of that tit on the piston.
Interestingly the engine still ran happily as the ball sealed the hole on the compression stroke. But much more use would have resulted in catastrophe.

The only problem with resetting the balljoint is that the tolerance is 1 to 3 thou of an inch. Let me tell you that ‘feeling’ this tolerance accurately is nigh on impossible.
So, here is how I go about doing it
The ‘special tool’ #675430756 is made of a bit of wood. The piano wire pin is kept in a hole drilled in it.

Compress the balljoint with a vernier and set the reading to zero. Don’t let the rod cant at an angle, keep it square to the piston skirt or the reading will be incorrect.

The following sequence of pictures shows how the ‘special tool’ is used. Notice it has a ramp and a slot cut into it. Slip the pin through the big end eye and slide the unit up the wedge to open the ball and socket to its maximum tolerance. Once again be sure to keep the con rod square to the piston skirt. The dimensions of the wood bit are not critical, just so long as it works


Now take the vernier reading from the crown to the big end of the rod. Because we zeroed the closed reading the open reading tells us what the tolerance of the ball joint is. In this case 6 thou. That means it needs to be closed up by 3 to 5 thou.

Using the Cox tool, and having read the instructions that come with it, close up the joint a little at a time. That is an 8 ounce hammer which I find suits me. I do this job on a hard surface such as a solid steel work bench or the concrete floor. It gives better control of the impact as there is no give or bounce back..

Measure the tolerance using the ‘special tool’ between adjustments to see how much the socket is being closed up. You do not want to overdo it. If the socket closes too much it can’t be opened out. The result is that the balljoint won’t get adequate lubrication and the engine will run poorly.
OK all good. The tolerance is 2.5 thou and I will stop before I go to far.

Note that I have run this engine a lot and hard on small props since this adjustment. A recent check has shown the tolerance has barely changed. Just goes to show if the tolerance setting is right it is not going to change and the engine runs well.